Outside, nestled in the shade of a large Japanese maple in front of the house, are a variety of plastic pots containing ferns, hydrangeas, and native azaleas that are destined for the woodland garden. These were recent purchases at a local 50% off sale. A few of my new plants, awaiting their permanent homesIt looks like a mini-nursery, and I am waiting in anticipation of cooler weather. Lou, who has to dig the holes for me, is maybe not so eager.
Autumn will soon be here, and in the southeastern US, this is the best time for planting and transplanting perennials, shrubs and trees. Since our ground does not freeze in the winter, plants will have months to establish themselves before next year's summer stress. Unfortunately, planting in the woodland area is not a matter of just digging holes. Shade is priceless in my part of the world, but the downside of all those trees is that their roots extend throughout the garden, sucking up available moisture. I have often put my shovel into the ground, only to find dry earth and lots of roots. This condition is called "dry shade", and it is one of the greatest challenges in creating a woodland garden. New plantings must compete with preexisting trees, as well as shrubs and other plants, for available water and nutrients.
When planting in dry shade, there are a number of strategies to give ornamental plants a good start:
1. I get rid of all weeds in the surrounding area before planting. These weeds will compete with newly planted ornamentals and if given the chance will smother them.
2. It is ok to cut through small tree roots, but never disturb major roots. If there are a lot of roots, I usually try to find another spot. Those roots will grow back quickly, and my little plant may not have a chance in the root competition game. If I must plant in that spot, sometimes I will line the hole with newspaper, forming a biodegradable barrier that will hold out competing roots until my plant's roots have had a chance to grow. Another thing I have done for perennials, if their root systems won't spread too far, is to plant inside of a large plastic pot buried in the ground. This will keep competing roots out. This also gives protection against root-eating critters such as voles.
3. Add mulch and soil conditioners to the soil at the time of planting. I do this 100 percent of the time. I usually make about a 50/50 mix of soil conditioners and native soil. I use home-made compost as well as soil conditioners I have purchased. These amendments improve the soil structure so that it will hold moisture longer. Sometimes I also pile wet, rotting leaves and other debris from the forest floor in the bottom of my planting hole.
4. Water the hole before planting. Of course, I also water the plant well after planting. It is very important to water new plants regularly for at least three to six months after planting. Remember that plants need to be watered deeply, not just sprinkled enough to wet the top layer of soil. Sometimes I have checked after I thought I had watered well, only to discover that the soil was bone dry less than an inch from the surface! The moisture needs to extend down far enough to reach below the plant. This is another reason I like to plant in the fall, as we tend to have wet winters that will promote good root growth.
5. After planting, I put a 2 to 3 inch layer of mulch around the plant. The mulch can be shredded leaves, pine straw, wood chips or any good organic mulch. The mulch should not actually touch the plant. The mulch itself holds moisture that will be available for the plant, and it also creates a small well around the plant that allows water to reach the plant's roots, rather than running off.
Mulch will break down, improving the soil. This also means the mulch will need to be replenished. In our climate mulch breaks down rapidly, and we replenish it once or twice a year around most of our plants.
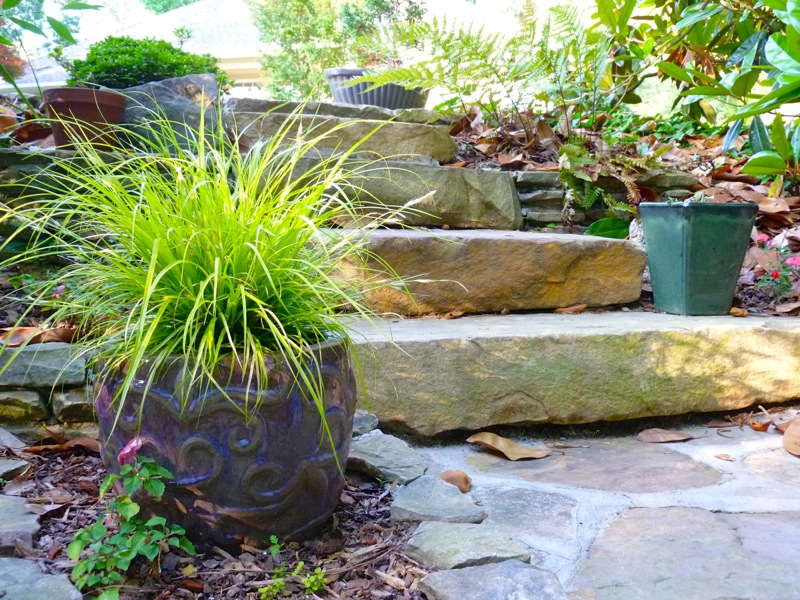
6. Sometimes I create elevated mounds of improved soil in which to plant. This works well for plants that should be planted high because of their need for excellent drainage, such as azaleas and hydrangeas. Sometimes I find hollow spaces between large tree roots and fill them with good soil. I like to do this for ferns, hostas and other perennials that look good at the bases of trees. However, do not mound large amounts of soil directly over tree roots, and never pile soil against tree trunks.  Elevated planting beds and pots beside the woodland steps allow me to have plantings where thick magnolia tree roots would otherwise make that impossible.
7. I like to plant shade-tolerant, drought-resistant plants. Natives will often do better than exotics. Remember that even these types of plants will need plenty of water when they are newly planted. They will not become drought-tolerant until their root systems are well established.
If you have a wooded area filled with dry earth and roots, don't despair of planting. But here is a secret: You don't always have to add new plants for a natural area to look beautiful. You can just clean the space of weeds, maybe cut some lower branches from trees to allow room to walk, add a nice layer of mulch, place a comfortable bench or swing, and hang a bird house and some wind-chimes. Voila! Instant (or almost instant) woodland garden! There is always lots to see in a woodland garden!